This article outlines the steps to efficiently add multiple members to your platform using the bulk upload feature in the Admin Dashboard. This process involves downloading a template, filling it with member information, and then uploading the completed file.
TABLE OF CONTENTS
Prerequisites
Role Requirements: To access the import section and perform a bulk upload, your staff access must be assigned either an Owner or Manager role.
Steps to Bulk Upload Members:
1. Navigate to the Import Section:
- In the Admin Dashboard, locate the left-hand navigation panel.
- Click on Data, then select Import.

2. Download the Members Template:
- On the Import page, click on Members Template.
- This will download an
.xlsxfile, which is the template you need to fill out with your member data.

3. Fill Out the Template:
Open the downloaded
.xlsxfile.Carefully fill in the required information for each member according to the following column specifications:
- Column A: Member's First and Last Name
- Column B: Member's Corresponding Email Address
- Column C: Member's Corresponding Network Name
Important: Ensure all information is accurate to avoid errors during the upload process.

4. Upload the Filled Template:
- Once you have completed filling out the template with all your member data, save the file.
- Return to the Data > Import section in your Admin Dashboard.
- Upload the filled
.xlsxfile using the upload option provided on the page.
What Happens After Upload:
- Upon successful upload, all members listed in your template will be added to your dashboard.
- The system will automatically send email invitations to the email addresses provided, prompting the new members to join the network.
- Once the system finishes processing your file, an automated email notification will be sent to your account email to confirm the status of the import.
Subject Line:
Members Import CompleteEmail Content: The notification will contain a summary table showing the total number of records successfully created, total rows processed, and a detailed list of any issues or notes for skipped rows.
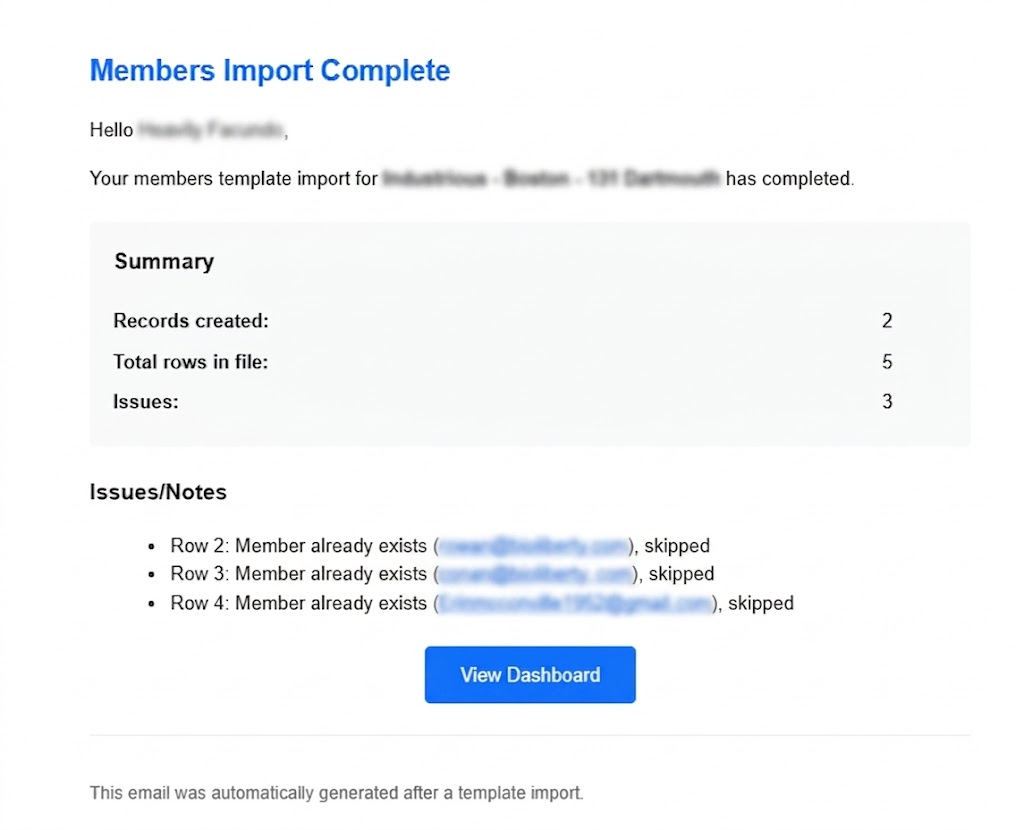
Understanding Issues and Skipped Rows
If your import confirmation email indicates that certain rows had issues or notes, it is usually because a row was skipped.
"Member already exists" Error: If a row is skipped for this reason, the email address is already active in your system.
Check the Guest Tab: If you cannot find the skipped user under your active Members list, they are most likely already added under a different category. Be sure to check the Guest tab to verify if they are already added there.
If you encounter any issues during the bulk upload process, please contact support for assistance.
Was this article helpful?
That’s Great!
Thank you for your feedback
Sorry! We couldn't be helpful
Thank you for your feedback
Feedback sent
We appreciate your effort and will try to fix the article